Managing CPE Activations
Governments; ISPs
This guide will walk you through how to manage CPE licensing, which allows for CPE to enrol when they first come online but cannot be used until they are activated, and licensing is based on the number of activated CPE.
Tip: Not all deployments use the CPE licensing model, if you are unsure of your deployment model contact your account manager.
Manually Activating Individual CPE
1. Go into the Management Suite on the top navigation, then select Agents.
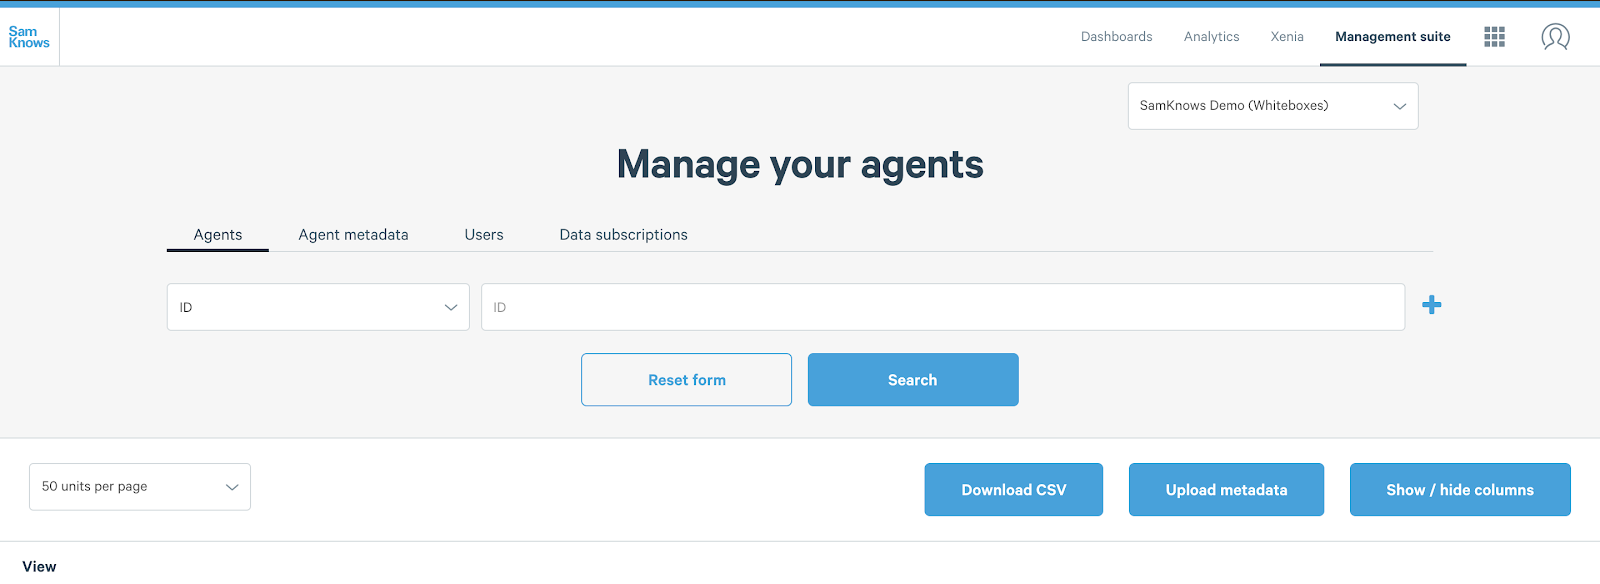
2. Find the agent using the search functionality. You can search by a number of standard fields and custom metadata fields you might have such as customer number. Click View once you’ve found the relevant agent.
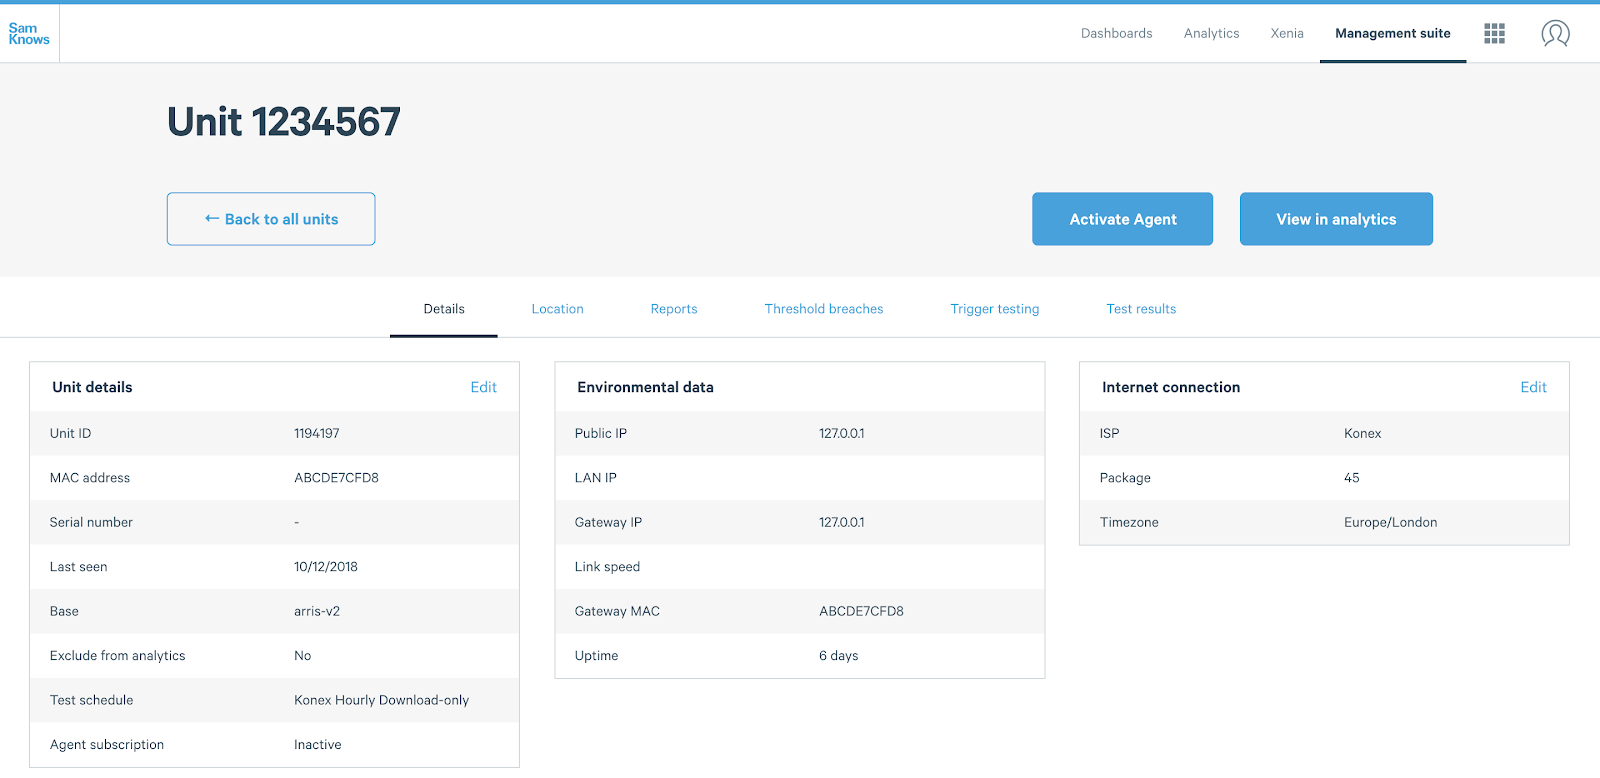
3. Click Activate Agent. You can now specify a reason for activation, the test schedule you wish the agent to use and if you have custom metadata fields, then you can assign values to them also.
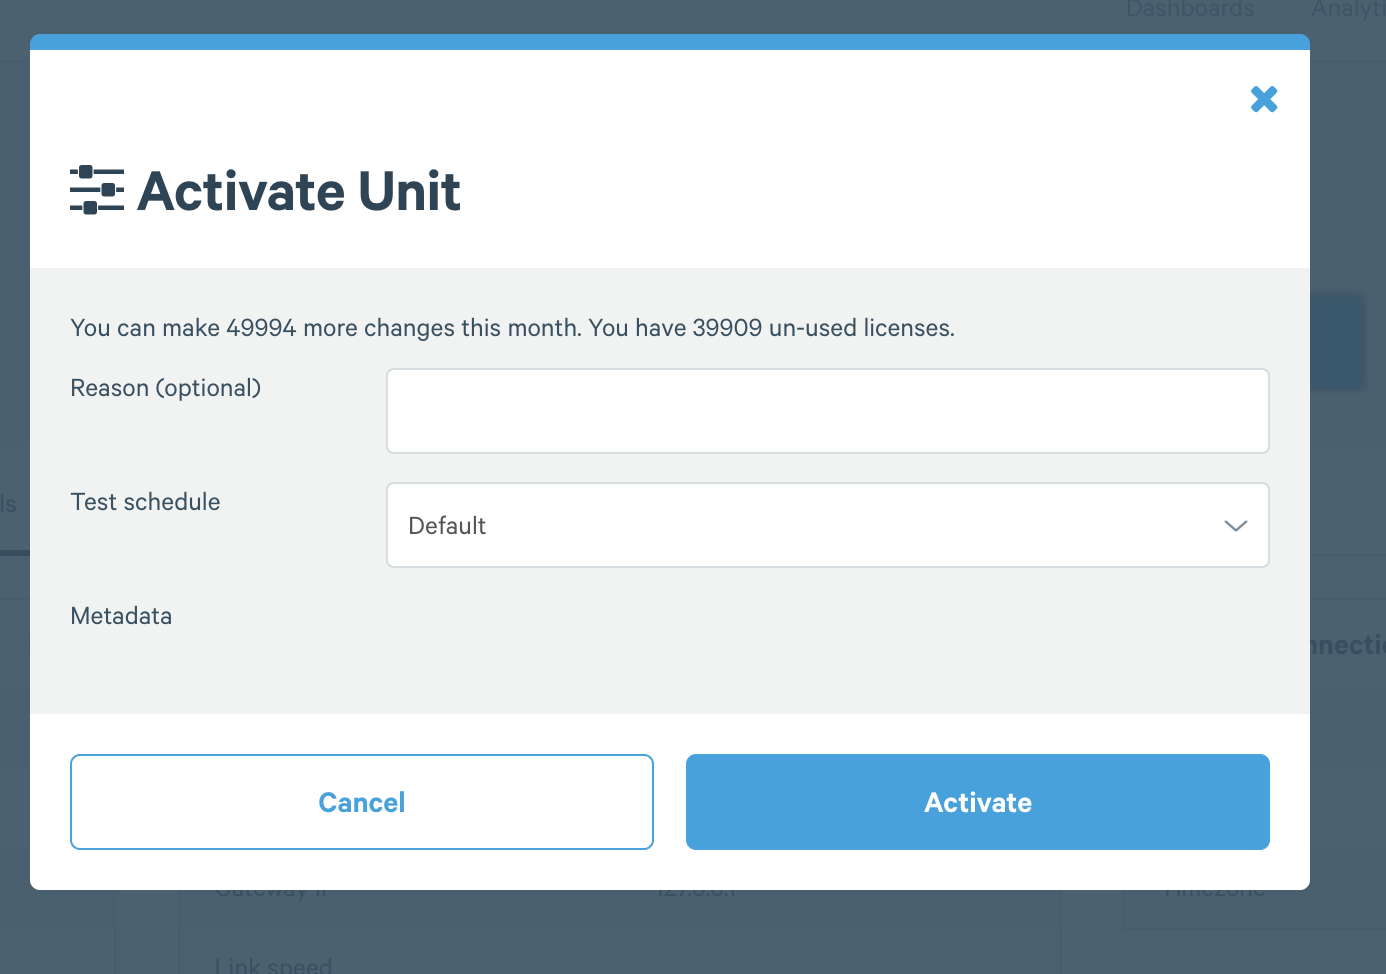
4. Once you’re done, click Activate.
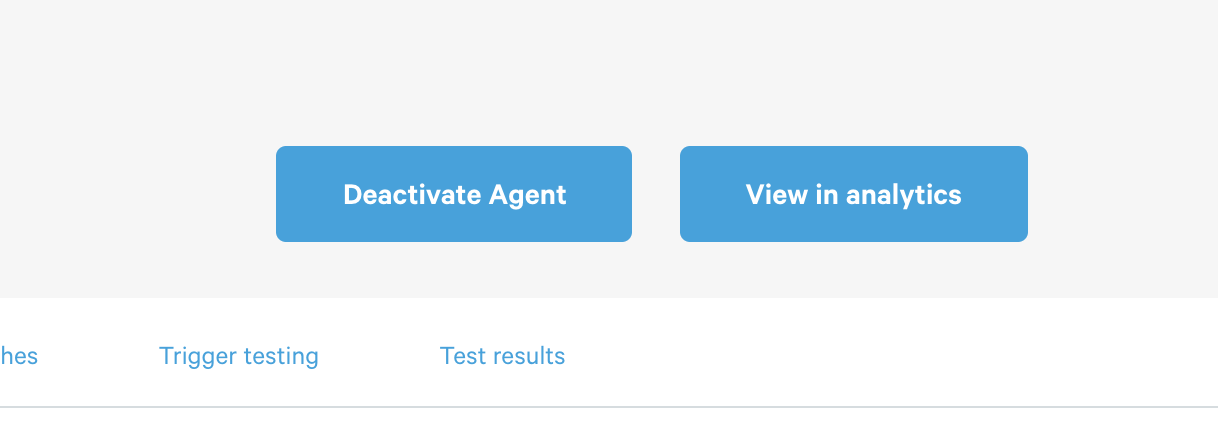
5. To deactivate the agent again, simply click Deactivate Agent where it will ask you for an optional reason.
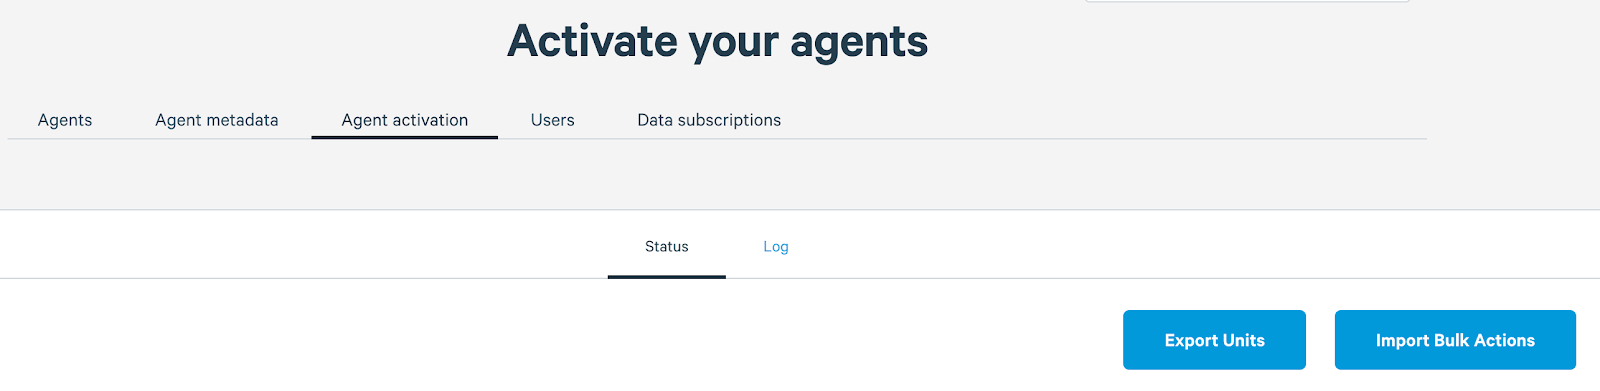
Bulk Activating CPE via CSV
1. Go into the Management Suite on the top navigation, then select Agent Activation.
2. Click Import Bulk Actions.
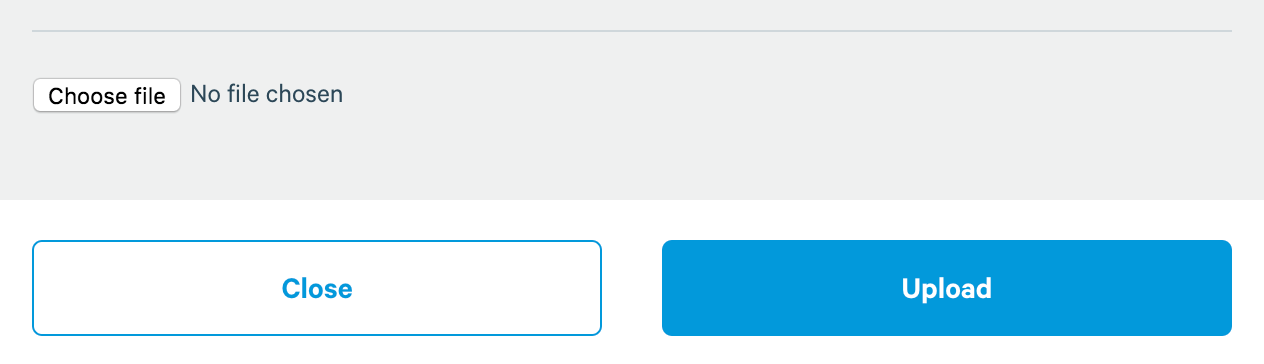
3. Upload your CSV (we look at what the CSV should include below) using the uploader and click Upload.
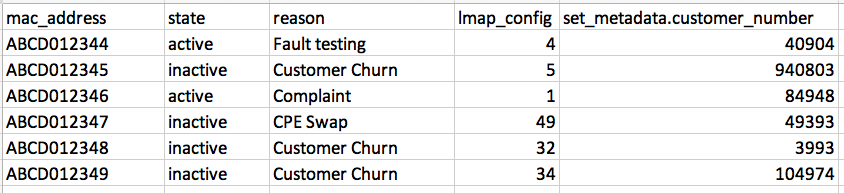
The CSV must have headers that match what we describe here.
The first column, which is required, is used to identify which agent you’re attempting to activate. It can be one of the following (note that if you include multiple of these columns the file will be rejected)
- unit_id - The SamKnows assigned unit ID of the agent
- serial_number - The reported serial number of the agent
- mac_address - The reported MAC address of the agent. All capitals and no dashes.
- metadata.{field} - CPE metadata defined as "metadata.field" where "field" is the name of your
- custom metadata field.
The second column should have the header ‘state’ and contain either ‘active’ or ‘inactive’ depending on what you would like the state to be.
The following columns are optional:
- reason - A free text reason that will be included in logs for the reason why it was activated (e.g. ‘Testing for a fault’)
- lmap_config - This is an ID corresponding to a test schedule, if you would like the CPE to be activated and put on a different test schedule than the default. Ask your account manager for a list of test schedules and IDs.
- set_metadata.{field} - This allows you to set custom metadata in your activation file where "field" is the name of your custom metadata field.
This might be an example file, where we select the agent by mac address:
Tip: If you are doing a large-scale integration, we recommend looking into using our agent activation API which allows you to programmatically get the status of, activate, and deactivate agents including activation for set periods of time before they are automatically deactivated.
CPE Activation Logs
1. Go into the Management Suite on the top navigation, then select Agent Activation.

2. Go to the Log Tab.

3. You can search the log by MAC address or Unit ID to find specific entries.

4. You can also export the entire log that matches the filter (or entire log if no filters used) using the Export Log Button.


